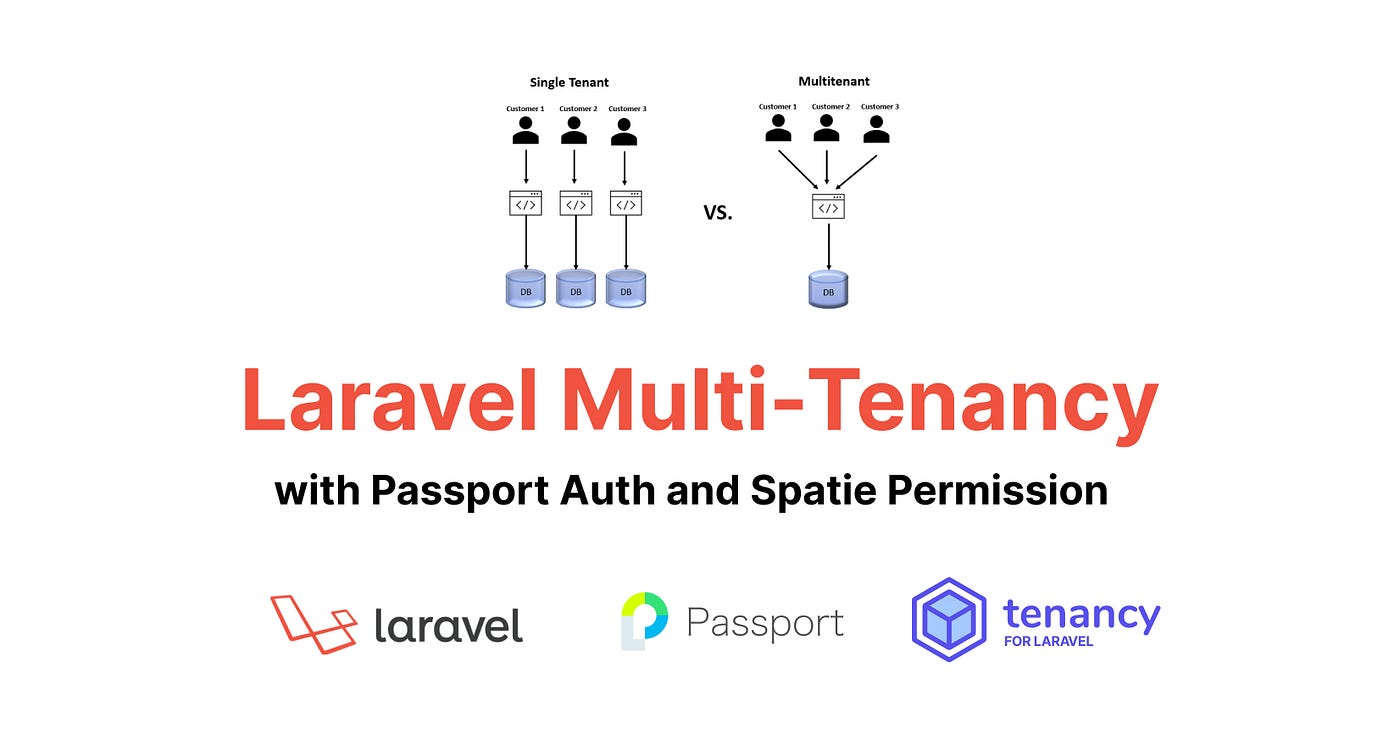
Laravel Multi-Tenancy with Passport Auth, Spatie Permission
Topics:
- What is multi-tenancy?
- Why do we use multi-tenancy?
- Types of multi-tenancy
- Install the Laravel Framework
- Install Multi-Tenancy Package
- Creating a tenant model
- Central routes configuration
- Central Domain Configuration
- Tenant Routes
- Tenant Migration
- Creating a tenant as a user with controller and Rest API
- Create UUID Trait for all models to generate a unique String ID
- Installation of Laravel Passport Package.
- Configuration of Laravel Passport
- Laravel-permission with Spatie Permission
What is multi-tenancy?
The ability to offer your service to several users (tenants) from a single hosted instance of the application is known as multi-tenancy. As opposed to installing the program individually for every user.
Why do we use multi-tenancy?
Multi-tenancy is a software architecture in which a single instance of a software application serves multiple customers, known as “tenants”. Each tenant has access to a dedicated and isolated portion of the application, with the ability to customize and configure the application to meet their specific needs. This approach offers several benefits, including:
- Cost savings: With multi-tenancy, an organization can offer a software application or service to many tenants at once, which can help to spread the costs of maintaining and operating the software over a more extensive user base. This can make the software more affordable for each tenant.
- Ease of deployment: With a multi-tenant architecture, it is easier to deploy and manage a software application or service because there is only one software instance to maintain and update.
- Customization: Multi-tenancy can also allow tenants to customize their own instances of the software, which can be beneficial if the software is being used by a variety of different organizations with different needs.
- Scalability: A multi-tenant architecture can be more scalable than a single-tenant architecture because the software is designed to support multiple tenants at once. This can be especially useful if the software is expected to be used by a large number of tenants.
Overall, multi-tenancy is a good architecture for many types of software applications, particularly those that are designed to be used by a large number of customers or organizations.
Types of multi-tenancy
In a multi-tenant system, data storage is a critical aspect that needs to be carefully designed and implemented. The main goal of a data storage strategy in a multi-tenant system is to ensure that each tenant’s data is isolated and secure, while simultaneously providing an efficient and scalable solution for storing and accessing the data.
There are several approaches to implementing data storage in a multi-tenant system, each with its own benefits and trade-offs. Some common strategies include:
- Single database with tenant-specific schemas: In this approach, a single database is used to store the data of all tenants. Each tenant has its own schema within the database, which allows for data isolation between tenants. This approach is simple to implement and can be efficient if the number of tenants is small and the volume of data is not too large.
- Single database with tenant-specific tables: Similar to the previous approach, this approach also uses a single database, but each tenant has its own set of tables within the database. This can be more efficient than the schema-based approach, especially if the volume of data is large and the number of tenants is small.
- Multiple databases: In this approach, a separate database is used for each tenant. This allows for complete data isolation between tenants but can be more expensive and complex to implement and manage.
- Object storage: Instead of using a traditional relational database, this approach uses an object storage system (such as Amazon S3 or Google Cloud Storage) to store the data of each tenant. This can be a scalable and cost-effective solution, but may not be suitable for all types of data or workloads.
Ultimately, the most appropriate data storage strategy will depend on the specific needs and constraints of the multi-tenant system. It is important to carefully evaluate the trade-offs between different approaches and choose the one that best meets the requirements of the system.
Install the Laravel Framework
To install the Laravel framework, you will need to have PHP and a web server installed on your system. In addition, you will need to install composer, which is a dependency manager for PHP.
Assuming that you have PHP and a web server installed, you can follow these steps to install Laravel:
- Download and install ‘composer’ by following the instructions on the composer website (https://getcomposer.org/download/).
- Once composer is installed, open a terminal window and navigate to the directory where you want to install Laravel.
- Run the following command to create a new Laravel project:
composer create-project laravel/laravel project-nameReplace “project-name” with the desired name for your project. This will create a new Laravel project in a directory with the specified name.
4. Run the following command to create a new Laravel project:
cd project-name5. Now you can start the Laravel development server by running the following command:
php artisan serveThis will start the development server at http://localhost:8000. You should see the Laravel welcome page when you visit this URL in your web browser.
That’s it! You have now installed the Laravel framework and can start developing your application.
Install Multi-Tenancy Package
To install the “stancl/tenancy” package in a Laravel project, follow these steps:
- Open a terminal window and navigate to the root directory of your Laravel project.
- Run the following command to add the “stancl/tenancy” package to your project:
composer require stancl/tenancyThis will install the “stancl/tenancy” package and update your project’s composer.json file to include the package as a dependency.
3. Next, you need to Run the following command:
php artisan tenancy:installThis will create a tenancy.php configuration file in your project’s config directory, and service provider and copy the package’s database migrations to your project’s database/migrations directory.
4. Next, you need to run the database migrations to create the necessary tables in your database. Run the following command:
php artisan migrate5. Finally, you need to update your application’s service providers array in the config/app.php file to include the App\Providers\TenancyServiceProvider::class service provider. Add the following line to the provider’s array:
/*
         * Application Service Providers...
         */
        App\Providers\AppServiceProvider::class,
        App\Providers\AuthServiceProvider::class,
        // App\Providers\BroadcastServiceProvider::class,
        App\Providers\EventServiceProvider::class,
        App\Providers\RouteServiceProvider::class,
        App\Providers\TenancyServiceProvider::class, //here


    ],
Creating a tenant model
You must now create a Tenant model. The package has a default tenant model with a ton of functionality, but because it tries to be largely unbiased, we have to build our own model in order to utilize domains and databases. Create the following file: app/Models/Tenant.php
<?php


namespace App\Models;


use Stancl\Tenancy\Database\Models\Tenant as BaseTenant;
use Stancl\Tenancy\Contracts\TenantWithDatabase;
use Stancl\Tenancy\Database\Concerns\HasDatabase;
use Stancl\Tenancy\Database\Concerns\HasDomains;


class Tenant extends BaseTenant implements TenantWithDatabase
{
    use HasDatabase, HasDomains;
}
You must now instruct the package to utilize this specific model. Modify the following line by opening the config/tenancy.php file.
// 'tenant_model' => Tenant::class,
    'tenant_model' => \App\Models\Tenant::class,
Central routes configuration
You’ll make a little adjustment to the app/Providers/RouteServiceProvider.php. In particular, You’ll guarantee that core routes are exclusively registered on central domains.
    // Configuring the central domains By Multi-tenancy
    protected function mapWebRoutes()
    {
        foreach ($this->centralDomains() as $domain) {
            Route::middleware('web')
                ->domain($domain)
                ->namespace($this->namespace)
                ->group(base_path('routes/web.php'));
        }
    }


    protected function mapApiRoutes()
    {
        foreach ($this->centralDomains() as $domain) {
            Route::prefix('api')
                ->domain($domain)
                ->middleware('api')
                ->namespace($this->namespace)
                ->group(base_path('routes/api.php'));
        }
    }


    protected function centralDomains(): array
    {
        return config('tenancy.central_domains');
    }
    // End of Configuring the central domains By Multi-tenancy
    /**
Instead of using the $this->routes() calls, use these methods directly from your RouteServiceProvider’s boot() function.
*/
    public function boot()
    {
        $this->configureRateLimiting();


        $this->routes(function () {
            $this->mapApiRoutes();
            $this->mapWebRoutes();
        });


        // $this->routes(function () {
        //     Route::middleware('api')
        //         ->prefix('api')
        //         ->group(base_path('routes/api.php'));


        //     Route::middleware('web')
        //         ->group(base_path('routes/web.php'));
        // });
    }
Central Domains configuration
Now you need to actually specify the central domains. A central domain is a domain that serves your “central app” content, e.g. the landing page where tenants sign up. Open the config/tenancy.php file and add them in:
'central_domains' => [
    'saas.test', // Add the ones that you use. I use this one with Laravel Valet.
],
No modifications are required if you’re using Laravel Sail; the default settings work just fine.
  'central_domains' => [
        '127.0.0.1',
        'localhost',
    ],
Tenant Routes
Let’s make a tiny adjustment to dump every user from the database so that you can observe multi-tenancy in action. Apply the following update by opening the file routes/tenant.php
Route::middleware([
    'api',
    InitializeTenancyByDomain::class,
    PreventAccessFromCentralDomains::class,
    ])->prefix('api')->group(function () {


    Route::get('/', function () {
        return 'This is your multi-tenant application. The id of the current tenant is ' . tenant('id');
    });
 });
Route::middleware([
    'web',
    InitializeTenancyByDomain::class,
    PreventAccessFromCentralDomains::class,
])->group(function () {
    Route::get('/', function () {
        return 'This is your multi-tenant application. The id of the current tenant is ' . tenant('id');
    });
});
Tenant Migration
Let’s transfer the user’s table migration (the file database/migrations/2014_10_12_000000_create_users_table.php or something similar) to database/migrations/tenant so that users may be found in tenant databases. Due to our event configuration, this will prevent the table from being generated in the central database and instead cause it to be created in the tenant database when a tenant is established.
Creating a tenant as a user with controller and Rest API
To create a new controller in Laravel, you can use the artisan command-line interface (CLI) to generate a new controller.
To do this, open your terminal and navigate to your Laravel project directory. Then, run the following command:
php artisan make:controller [ControllerName]Replace [ControllerName] with the desired name for your controller.
Create a controller named TenantController, you would run the following command:
php artisan make:controller TenantControllerInside this file, you will write the create tenant function
<?php


namespace App\Http\Controllers;


use App\Models\User;
use App\Models\Tenant;
use Illuminate\Support\Env;
use Illuminate\Http\Request;
use Illuminate\Support\Facades\Hash;


class TenantController extends Controller
{


    // Create Tenant
    public function createTenant(Request $request)
    {
        $request->validate([
            'companyName' => 'required',
            'email' => 'required|email',
            'password' => 'required',
        ]);


        // Create Tenant Database
        $tenant = Tenant::create(['id' => $request->companyName]);


        // Create Tenant Domain
        $tenant->domains()->create([
            'domain' => $request->companyName . '.' .env('APP_DOMAIN'),
        ]);
        $tenant->run(function() use ($request){
            // Create User
            User::create([
                'name' => $request->companyName,
                'email' => $request->email,
                'password' => Hash::make($request->password),
            ]);
        });
        return response()->json([
            'message' => 'Tenant created successfully',
            'tenant' => $tenant,
        ]);
    }
}
You can then register this controller with a route in your Laravel application to handle requests to a specific URL.
For example, you might add the following route to your routes/api.php file:
Route::post('/createtenant', [App\Http\Controllers\TenantController::class, 'createTenant']);To make a POST request using Postman, follow these steps:
- Open Postman.
- Create a Request and In the “Select request type” dropdown, select the “POST” option.
- In the “Headers” tab, define the header value “Accept”: application/JSON.
- In the “Body” tab, you can enter the request payload. The payload can be in any of the following formats:
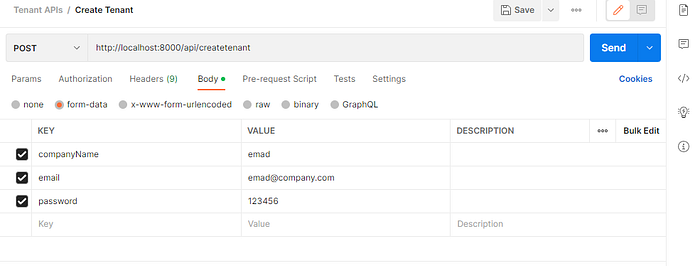
http://localhost:8000/api/createtenant
5. Click Send Button to create your tenant with the user.
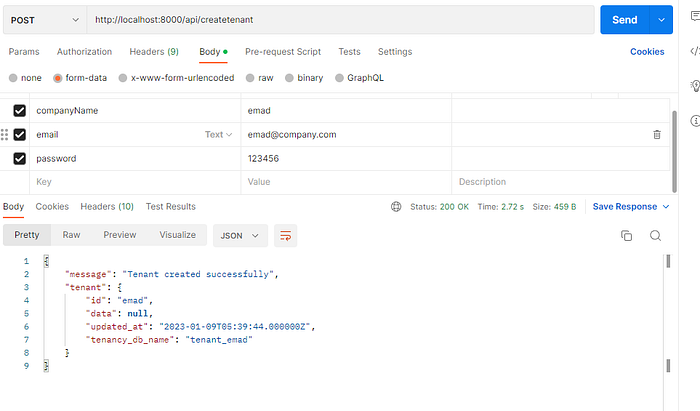
Yes! You set up Multitenancy successfully.
Create UUID Trait for all models to generate a unique String ID
In the Laravel web application framework, you can create a trait that implements a Universally Unique Identifier (UUID) using the following steps:
- Create a new file named Uuid.php in the app/Models/Traits directory.
- And add the following code:
<?php
namespace App\Models\Traits;


use Illuminate\Support\Str;


    trait Uuid
    {
        protected static function bootUuid()
        {
            static::creating(function ($model) {
                $model->keyType = 'string';
                $model->incrementing = false;
                if (empty($model->{$model->getKeyName()})) {
                    $model->{$model->getKeyName()} = Str::uuid();
                }
            });
        }
    }
In Laravel, you can use a trait in a class by including the use statement at the top of the class file, followed by the name of the trait you want to use. Here’s an example of how to use a trait named Uuid in a class named User:
<?php


namespace App\Models;


use App\Models\Traits\Uuid;


class User
{
    use Uuid; // here is custom Uuid Trait


    // class methods and properties go here
}
Installation of Laravel Passport Package
Note: There is no further setting necessary if Passport is just used in the central application. Installing it is as simple as following the Laravel Passport docs.
Using Passport in the tenant application only
Note: Don’t use the passport:install command. In the central application, the command generates two clients and the encryption keys. In its place, we will manually generate the keys and create the clients.
To use Passport inside the tenant part of your application, you may do the following.
- Publish the Passport migrations by running php artisan vendor:publish — tag=passport-migrations and move them to your tenant migration directory (database/migrations/tenant/).
- Publish the Passport config by running php artisan vendor:publish — tag=passport-config. Automatically create a file name by passport.php in the config folder. Then, make Passport use the default database connection by setting the storage database connection to null. passport:keys put the keys in the storage/ directory by default — you can change that by setting the key path.
    // Database Connection for Passport
    'storage' => [
        'database' => [
            'connection' => null,
        ],
    ],


'key_path' => env('OAUTH_KEY_PATH', 'storage')- Prevent Passport migrations from running in the central application by adding Passport::ignoreMigrations() to the register() method in your AuthServiceProvider.
- Then, for the passport key path declaration add Passport::loadKeysFrom(base_path(config(‘passport.key_path’))); to the boot() method in your AuthServiceProvider.
- If you’re using Passport 10.x, register the Passport routes in your AuthServiceProvider by adding the following code to the provider’s boot() method:
Passport::routes(null, ['middleware' => [
        InitializeTenancyByDomain::class, // Or other identification middleware of your choice
        PreventAccessFromCentralDomains::class,
]]);- If you’re using Passport 11.x, disable the automatic Passport route registering in your AppServiceProvider by adding Passport::ignoreRoutes(); to the register() method. Then, register the Passport routes manually by adding the following code to the boot() method:
 public function boot()
    {
        Passport::$registersRoutes = false;


        Route::group([
            'as' => 'passport.',
            'middleware' => [InitializeTenancyByDomain::class], // Use tenancy initialization middleware of your choice
            'prefix' => config('passport.path', 'oauth'),
            'namespace' => 'Laravel\Passport\Http\Controllers',
        ], function () {
            $this->loadRoutesFrom(__DIR__ . "/../../vendor/laravel/passport/src/../routes/web.php");
        });
}- Apply Passport migrations by running php artisan tenants:migrate.
Passport encryption keys
To generate a single Passport key pair for the whole app, create Passport clients for your tenants by adding the following code to your tenant database seeder.
class PassportSeeder extends Seeder
{
    /**
     * Run the database seeds.
     *
     * @return void
     */
    public function run()
    {
    $client = new ClientRepository();


    $client->createPasswordGrantClient(null, 'Default password grant client', 'http://your.redirect.path');
    $client->createPersonalAccessClient(null, 'Default personal access client', 'http://your.redirect.path');
    }
}
You can set your tenant database seeder class in config/tenancy.php file at seeder_parameters key.
Then, seed the database and generate the key pair by running php artisan passport:keys.
Laravel-permission with Spatie Permission
Install the package like usual, but publish the migrations and move them to migrations/tenant:
php artisan vendor:publish --provider="Spatie\Permission\PermissionServiceProvider" --tag="migrations"
mv database/migrations/*_create_permission_tables.php database/migrations/tenant
Next, add the following listeners to the TenancyBootstrapped and TenancyEnded events to events() in your TenancyServiceProvider:
Events\TenancyBootstrapped::class => [
    function (Events\TenancyBootstrapped $event) {
        \Spatie\Permission\PermissionRegistrar::$cacheKey = 'spatie.permission.cache.tenant.' . $event->tenancy->tenant->id;
    }
],

Events\TenancyEnded::class => [
    function (Events\TenancyEnded $event) {
        \Spatie\Permission\PermissionRegistrar::$cacheKey = 'spatie.permission.cache';
    }
],
The reason for this is that spatie/laravel-permission caches permissions & roles to save DB queries, which means that we need to separate the permission cache by the tenant. We also need to reset the cache key when the tenancy ends so that the tenant’s cache key isn’t used in the central app.